
Are you looking for handmade ideas for Mother’s Day gifts to do with your children or students? Mother’s Day is just around the corner and I’ve got a few ideas for you! This is a list of ideas I published last year, but wanted to share again, with detailed instructions.
Colorful vase – This is a simple process that creates a beautiful end result using recycled bottles and tissue paper. The children really enjoy making these and each one is unique.
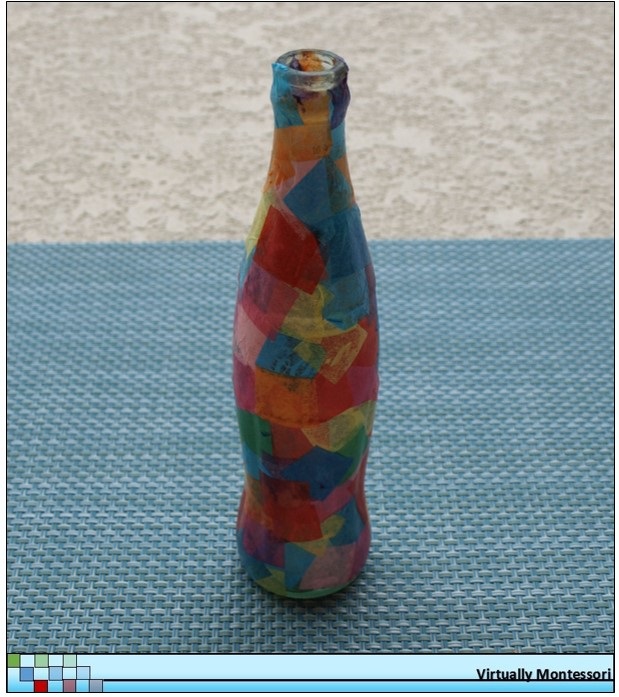
Tissue paper and recycled bottle vase
Supplies needed: glass bottles or jars, tissue paper, Mod Podge® or white glue (thinned with water), small foam brush *Note: Mod Podge will act as a sealant and leave a shiny finish, while white glue will not.
- Cut various colors of tissue paper into small pieces, approximately 1″ square.
- Using the foam brush, spread Mod Podge (or glue) over a small area of the bottle.
- Place pieces of tissue paper over the Mod Podge, making sure to overlap the pieces slightly so that no glass is showing.
- Continue steps 2 and 3 until the entire bottle is covered.
- Apply one thin coat of Mod Podge over the entire bottle.
- Set the bottle aside and wait for it to dry.
Added bonus: Create custom-colored flowers and incorporate science into your gift-making! Buy white carnations, trim the stems, and set the cut stems into various jars of colored water for about 24 hours. Watch the flowers change color, then place them in the vase for Mom.
Custom poem – Have you been studying poetry with your class? As an extension to your studies, have students write a poem of their own for Mom. Acrostics using “Mother” or their moms’ names are fun and can be done across many grade levels. For the more sophisticated poets, encourage a haiku, cinquain, or free verse style!
Examples of Mother’s Day acrostic and free verse poems
- Choose which type of poem to write (Acrostic? Cinquain? Haiku? Free verse?).
- Brainstorm ideas and write a rough draft. Having a thesaurus on hand helps, too!
- Write (or type) the final draft.
- Decorate.
- If desired, frame the poem or roll it and tie with a ribbon and it’s ready to go!
Top 10 list – Have children write a “Top 10” list of favorite memories or favorite activities they’ve enjoyed with Mom. Super easy to do, and almost guaranteed to make moms a little misty-eyed.
![]()
- Have students brainstorm a list of their favorite activities or memories they’ve shared with their moms. I’ve found that some students need some general suggestions, such as what special traditions they have for holidays, something they did together last weekend, on vacation, etc. to help the creative juices flow.
- Edit lists and make changes as necessary.
- Write (or type) the final copy.
- Decorate. We had students decorate with colored pencils to create a border or simple design.
- If desired, frame the list (local dollar store frames worked well) or roll “scroll-style” and tie with ribbon. Voila!
Flowery bookmark – Use pressed flowers and a custom note to create a special bookmark for Mom. These are pretty easy to do, and could be incorporated into a study of plants and flowers. You will need to plan ahead a bit for this one, though, as it takes about 2 weeks for the flowers to be pressed.
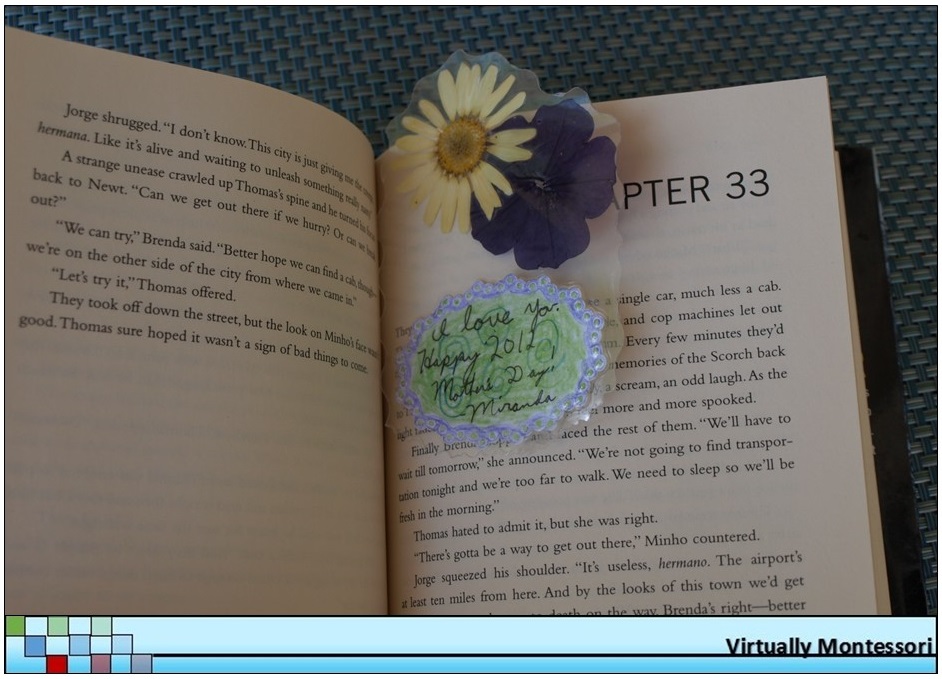
Bookmark with pressed flowers
- Buy a variety of colorful flowers such as daisies or pansies (flowers with larger petals work well – they’re less likely to fall apart).
- Cut a piece of wax paper, about 6″ wide and set in front of you.
- Gently place 3-4 small flowers on the top half of the wax paper, making sure the flowers don’t overlap and are not near the edge of the paper.
- Fold the wax paper in half from the bottom up, making sure to get the flowers to lay as flat as possible between the layers of wax paper.
- Write the student’s name on the wax paper.
- Place the folded wax paper inside a heavy book and set in a location where it will not be disturbed. After about 2 weeks, your flowers should be dried and flattened.
- Using the tweezers, carefully remove the flowers from the wax paper and place in the laminate sheet, arranging as desired. (If using a professional laminator, place the flowers on cardstock that can go into the laminator.)
- Write a small note to be included in the bookmark and set it on the laminate (or cardstock) near the flowers.
- Laminate and cut out.
I hope you find these ideas to be helpful for your gift-making plans!